

How To Make An Image Have Border Photoshop
Do you lot desire to put a border around your photos? Photoshop can apace assistance you practice that.
Photoshop offers plenty of edge customization options, like thickness and colour, to change how your border looks. In one case your border is set, you tin can either apply it to i of your photos or all of your photos at one time.
Here, we'll show how to add a border to a single photo, equally well as how to add together borders to multiple photos at once using Photoshop.
1. How to Add together a Border to a Single Photo in Photoshop
The case beneath adds a ruby border that's 5px thick to a photo. You're gratuitous to alter these options so that your border looks exactly the style you want it to.
If you are curious to know how this procedure works, information technology works like this: you make a indistinguishable of your layer, change the canvas size to adapt your new edge, add together a fill up layer with the edge color of your choice, and finally move the new fill layer backside your main photo.
Here's how you do all that step-by-pace:
- Open up a photo with Photoshop, right-click the layer on the right, and select Duplicate Layer.
- Click OK in the box on your screen to create a new duplicate layer.
- Click the Epitome carte at the summit and select Canvas Size.
- Tick the Relative box, enter5 as the border size in both theWidth and Tiptop boxes. Then, select Pixels as the size unit, click the centre dot in the Ballast carte, and hit OK.
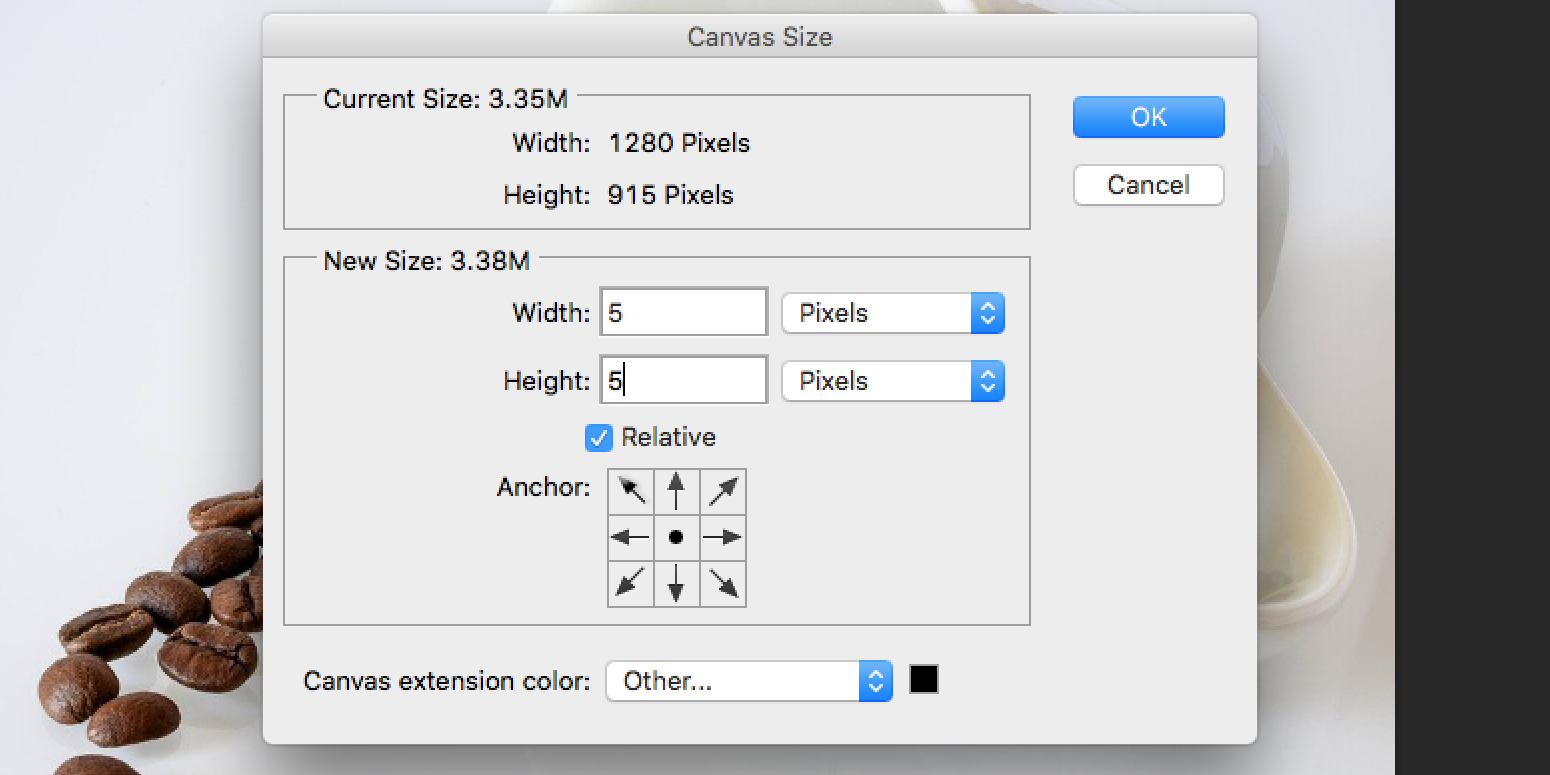
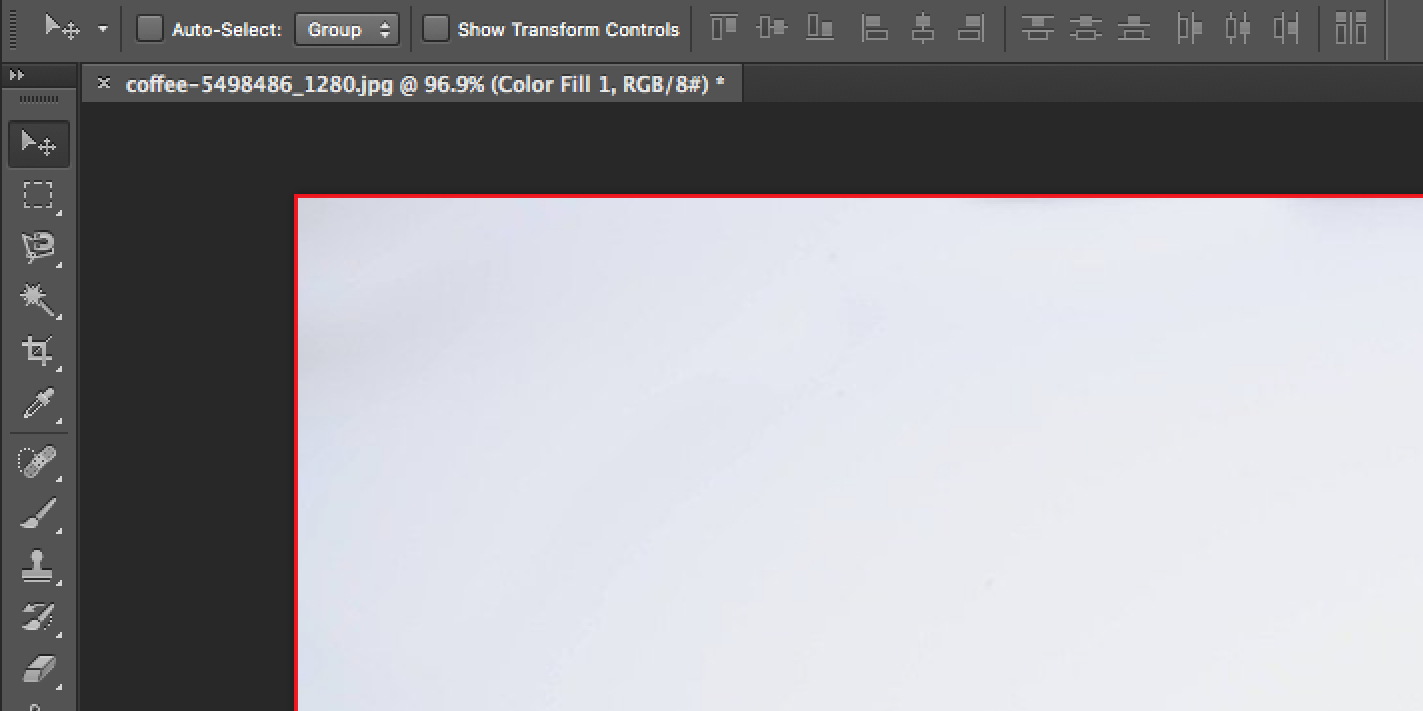
- You should now have a specified bare expanse around your photo. This is what'southward going to be filled in with the border color of your selection.
- Click the Layers carte du jour at the top and select New Fill Layer > Solid Color.
- Click OK in the box on your screen. You don't need to choose a edge color nevertheless, as you will practice it on the next screen.
- Option red (or any other colour) for your border from the colors menu, and hitting OK.
- Your border color is the simply affair you will meet on your screen. To bring your photo in front of the color layer, select the Color Fill i layer from the right side of your screen, and drag information technology beneath the layer you duplicated earlier.
You should now see your photo along with your called border around it. Click the File > Salve option to save the photo.
Tip: You don't e'er demand to duplicate the layer as we did in the to a higher place procedure. We just included this step because some photos have a locked background layer, which might prevent you from adding a border to your photo.
2. How to Add a Border to Multiple Photos in Photoshop
While yous can utilise the above method to add a border to your photos one at a time, it'southward not convenient if you accept a load of images to piece of work with. Luckily, Photoshop has a characteristic called Actions to automate your tasks.
For this particular job, you can create an Activity and salve it. And so, use the Automate tool and run the Activity for an unabridged binder of your photos. This will add together a border to all your photos without any manual interaction for each item.
There are 2 phases yous need to go through to set this up, and those are equally follows.
Record the Action to Add a Border to a Photograph
The first thing to do is to record an Activeness that adds a border to a single photograph. You can do that as follows:
- Open a photograph with Photoshop, click the Window menu at the tiptop, and select Workspace followed by Photography. This volition add Actions to the right side of your screen.
- Click the play push icon on the right to view the Deportment carte, and select the Create new action option to add a new action.

- Type the name for your Activeness and hit Record. This is the name that you lot will use to recognize this Action.
- Now that recording has begun, follow the steps outlined above to add together a border to a single photo.
- When a border is added to your photo, salve the photograph by selectingFile > Save Every bit. From hither, choose the folder where yous'd like to relieve the photos, select an image format, and hit Save. Don't enter a proper name for the photo; permit it stay every bit is.
After Photoshop has added a edge, it volition save your photos in the folder that you specified in the final step outlined above. Also, it will preserve the original names of all your photos.
Use the Photoshop Action to Add Borders to Multiple Photos
At present that your action is set, you need to bind it to the Automate feature in Photoshop to run it for all your photos. If the photos you desire to edit are on another device, brand sure you lot import all the photos to your computer first.
Your photos can be in whatever format, and they will work as long as Photoshop supports that format.
Once you lot have done that, follow these steps to majority add together borders to your photos:
- Create a new binder, call information technology Without Border, and copy all your photos to it.
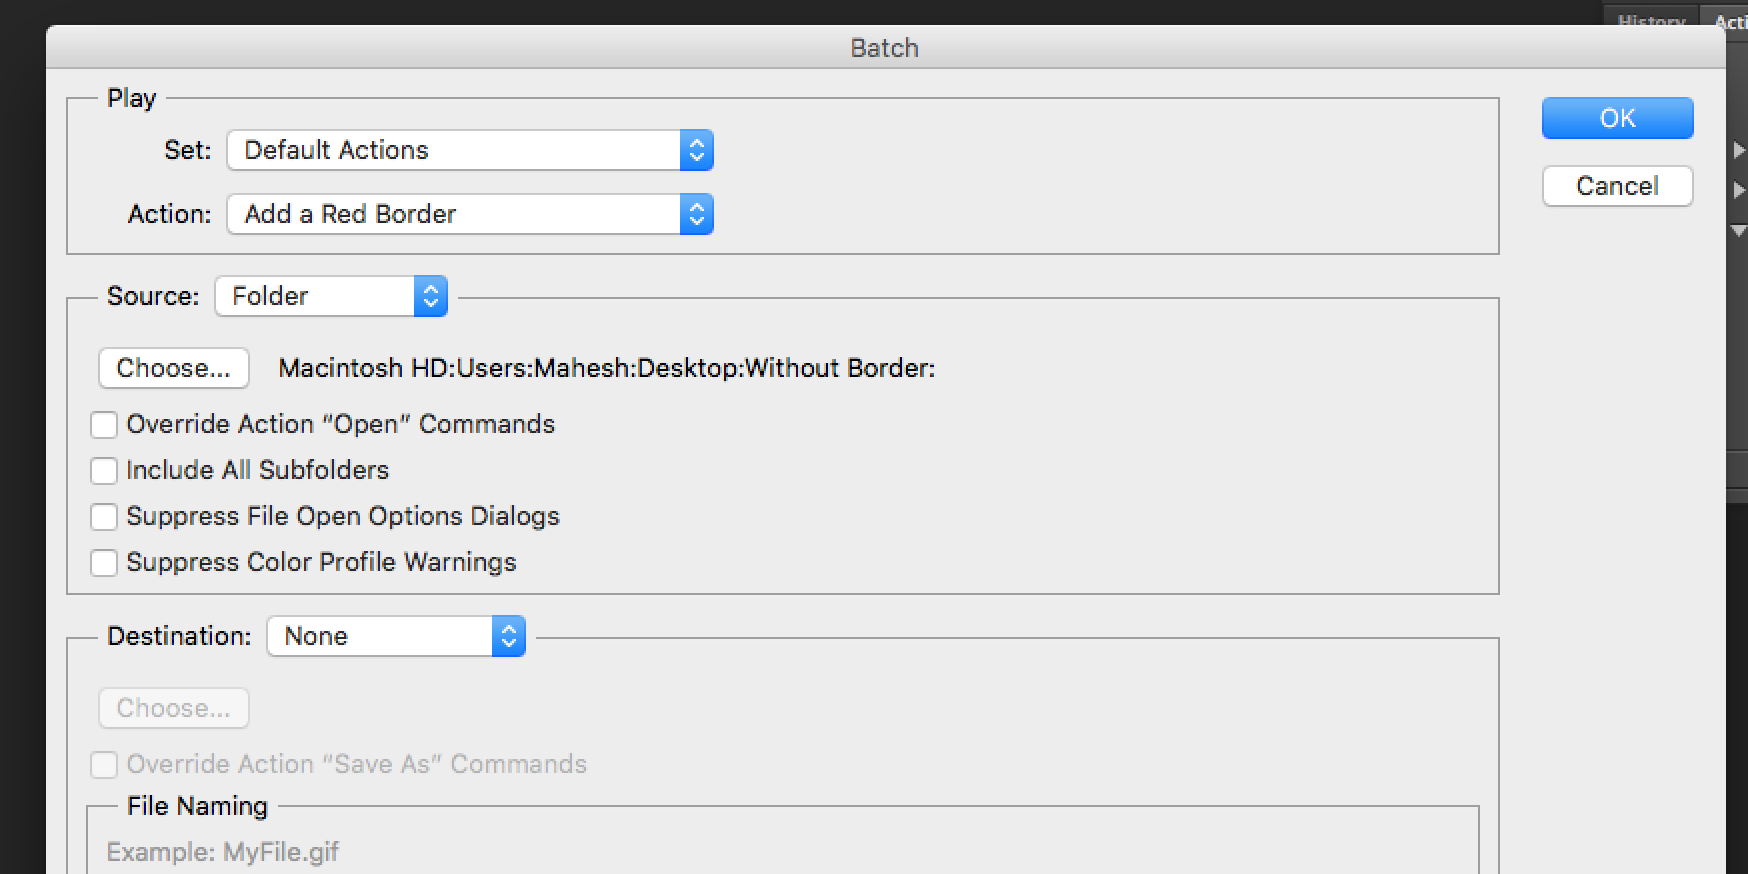
- Launch Photoshop and click File > Automate > Batch.
- From the Action carte at the top, select the border Action that you recorded earlier.
- Cull Binder from the Source dropdown carte.
- Click the Choose button and select the Without Border folder you have created.
- Finally, click OK and Photoshop will start adding borders to all of the photos in your selected folder.
Add Borders to Your Photos With Ease
Adding a border to your images shouldn't be difficult. With Photoshop, not only can you easily add a border to a single photo, but you can add together borders to thousands of your photos with almost no endeavor.
Merely if you don't have Photoshop, or are looking to explore other options, you lot should know that there are enough of other ways to add a edge to your photos as well.
About The Author

Source: https://www.makeuseof.com/add-borders-photos-using-photoshop/
Posted by: laneprouvide.blogspot.com
0 Response to "How To Make An Image Have Border Photoshop"
Post a Comment